Showing posts with label font. Show all posts

Friday, July 30, 2010

Enable Fonts in command Prompt - Cool Computer Tricks

Do you noticed that you have only 2 fonts in command prompt. If you want ot work in command prompt in iffrent font then you have to enable that font for it.

In order to enable additional fonts in the command prompt, you’ll need to do some changes in registry.

Follow given steps:

1). Open Run.

2). Type Regedit and press enter.

3). Now window ll ask for your perimission to continue just click on continue.

4). In registry editor window , browse to the following key:

HKEY_LOCAL_MACHINE\SOFTWARE\Microsoft\Windows NT\CurrentVersion\Console\TrueTypeFont

5). Here on the right hand pane is the list of enabled True Type fonts.

6). To add another font, right click anywhere and select new and then string value.

7). Enter its name 00.

8). Set the value to the name of the font you want to enable.

9). Click OK.

Its done.

Restart your computer, After rebooting change font of your command prompt to this newly enabled font.

Change Command Prompt default FONT - Cool Computer Trick

If you are get bored of default command prompt's font then now you can change its font easily. Here are steps to change command prompt's default font.

Just follow these steps:

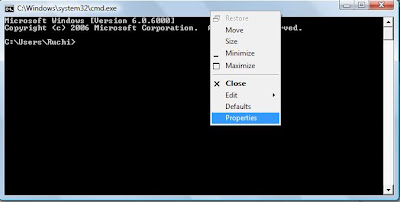
1). Open command Prompt.

2).
Right click on title bar and select properties.


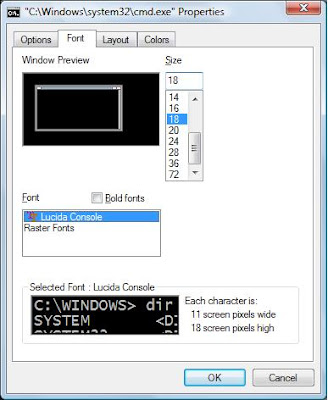
3). In properties window, Click on font tab.

4). Here
choose font and its size.


5). Click OK.
Its done.

You have noticed that in font it shows only 2 styles, as command prompt by default enable only these 2 font styles. If you want to have some more font then you can enable font in command prompt by doing some chnges in Registry.

Click here to enable more fonts in Command Prompt.

Install , view and delete Fonts


Wanna use some new, different fonts? I you get bored of usual fonts installed in your system and want to try some new fonts then try this, here are steps to install new fonts:


Vista or Window7 Users

Install new FONTS

1). Download font which you want to install from internet.

2). Right click on that font and click on install.
A small window will appear showing the progress on adding the new fonts to your system. Your new fonts will be ready to use as soon as this window auto-closes.


View and Delete FONTS


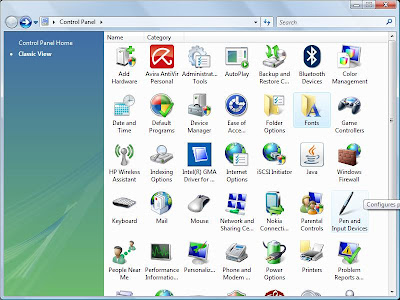
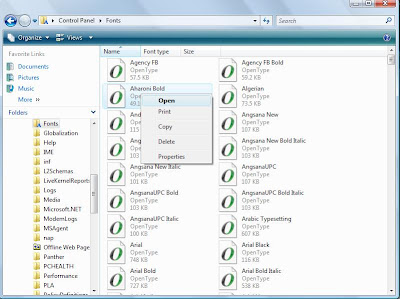
1). Open control Panel.

2). In control panel, Double click on font.


3). Here you can view all installed fonts, you can open any font.


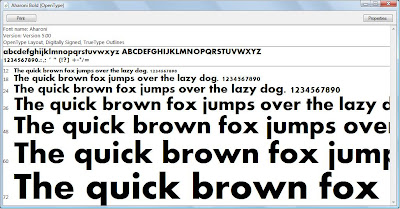
4). To open right click on font and then select open. Here you can see font information at top and its preview.


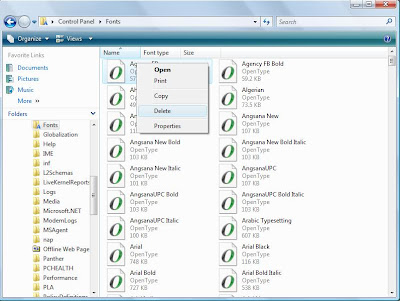
5). To delete font, Right click on font and then click on Delete.


Window XP Users

1). Open control Panel.

2). Click on Appearance and themes.

3). Here click on font present on left sidebar.

4). To install new font, Go to file menu and click on install new font.
It will open a window where you have to browse to location of new font. after browsing click on install.


5). To view or delete font Right click on that font and choose open or delete.

Thursday, April 29, 2010

Change Font settings in Google Chrome


Do you want to change tex size or to change font of your browser so that whenever you open any webpage it will be in your choosen font and text size? Here is steps to change font settings in Google Chrome. For mozilla Firefox read previous post.

Here are steps for Google Chrome

1). Open Google Chrome.

2). Click on the wrench icon (last icon on right hand side of address bar).

3). Click on Options.

4). Go to Minor Tweaks tab and click on Change Font and Language setting.

5). Now in font and languages window, You can choose the font and size for the text.


6). After choosing font and text size, Click on Ok.

Its done.

Change font type and text size of Mozilla Firefox


Here is trick by using this you can change the font and text size of your browser. You have to just change some settings in mozilla firefox, after that all webpage will open in your choosen font and text size

Here are steps for this:

1). Open Mozilla Firefox web browser.
2). Click on Tools and then Options.

3). Now go to Content Tab and Click on Advanced option in Font and Colors section.


4). Here select the font and size for the text that you want to see.

5). Uncheck the option, allow the web page to choose its own font


6). Click OK.

Its done.

Friday, January 22, 2010

Improve font display in window xp

Now you can improve font display in window XP. Window xp has ClearType, a Microsoft's anti-aliasing font display technology that can dramatically improves font display. but it isnt enabled by default in xp you have to enable it.

To enable ClearType:
1) Right click on the desktop, select Properties.
2) Go to Appearance, Effects and then select ClearType from the second drop-down menu.
3) Enable ClearType.

If you want to use ClearType on the Welcome login screen as well, follow these steps:

1) Go to run, type regedit.
2) regedit editor window appears here go to HKEY_USERS/.DEFAULT/Control Panel/Desktop/FontSmoothing.
3) Set value of FontSmoothing to 2.

It gives best results on laptop displays.